Car wraps are not like flyers, business cards or brochures that can be designed and printed easily. Creating a vehicle wrap requires vast knowledge and experience in many different aspects such as material, design, production, preparation, installation and post installation.
Design
To design a flyer you simply add the contact information, logo and advertising details, and then you are done. It is entirely different when it comes to car wraps. You must have the right tools and latest templates to create a design that will fit a particular vehicle without getting the images distorted when installed in the vehicle.
Angles, spaces and curves must be taken into consideration. When these are ignored, you come up with something that is difficult on the eyes. A badly designed car wrap can also give a negative image for your business.
Materials
You can have the best vehicle wrap design and the best wrap installer, but if you have the wrong materials, everything can go extremely wrong.
Top brand names for vinyl wraps include 3M, Avery, Oracal and Arlon. Just like everything else, you truly get what you pay for. Never skimp on the materials to get the most out of your vehicle wrap. The material you choose will determine the longevity and quality of the wrap.
If a vehicle wrap company is working on your project, check if they use a combination of vinyl and over-laminate and whether they are both of high quality. Some companies use 3M vinyl under a cheaper laminate just to reduce the cost.
You should know that there are two types of laminate—the cast laminate and the calendared laminate. The former is about three times the cost of the latter. At first, it’s difficult to tell the difference but you will soon find out that calendared laminates easily fade compared to cast laminates. Also, calendared laminates bubble out after a few months.
Facility
Now that you’ve come a long way, you wonder where the actual wrap installation will take place. Should it be indoors or outdoors? Ideally, there should be a dedicated installation facility exclusively for the vehicle wraps.
If the installation will be done outdoors, you are off to a terrible start. Installing it outdoors will make it difficult to avoid dust particles sticking to the surface of the car. Even the smallest particles will show through the laminate and will be noticed right away. The result, therefore, will be dreadful.
Production
Let us now assume that you already have the perfect design and the best materials ready for production. Unfortunately, it is impossible to do this on your own unless you own a printing company. A simple HP or Brother printer won’t cut it. There are a lot more tools and facilities needed in order to produce a car wrap with sharp and vibrant images.
Preparation
Taking it to a step further is the prep process. This is the portion where the installer will have to go through the vehicle to inspect the surface for cracks, trims and dents. It is also done to make sure that the surfaces are clean. The vehicle is washed one day before the installation to allow it to dry completely.
Vehicle wrap installers use a special solution to wipe the car for any wax residue left on the surface of the vehicle. After that, the car is wiped again using alcohol to make sure that the solution that was previously used is completely removed. All these are done to ensure that the adhesive of the vinyl will stick to the vehicle surface without any problems.
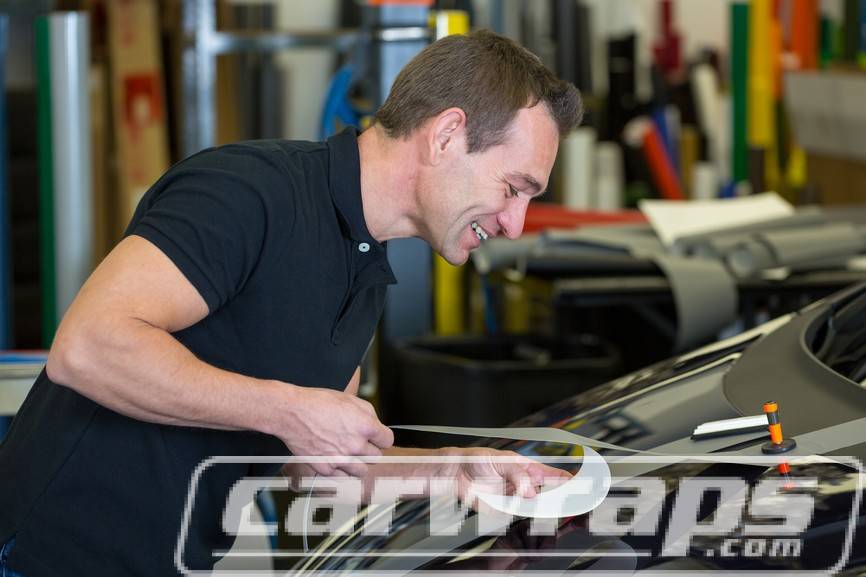
Installation
Installation takes countless hours because of the complexity of the job. You can have the best design, superb material and you could have perfectly prepped the vehicle for the installation but all these can totally not work out as you want if an inexperienced installer wraps the vehicle.
Different media and materials have different characteristics. For instance, it can be more difficult to install a matte vinyl than other printed car wraps. Without extensive experience, an installer will not know how different materials behave on varying car surfaces.
The installation of the wrap is already very difficult to begin with, but the trimming of the wrap is an even bigger challenge. An installer must be able to trim and tuck the wrap to achieve a flawless finish.
Vehicle wrap installation requires a steady hand, a lot of patience and technique that can only be learned through experience. Experience is what sets apart a good installer from an excellent one.
Post Installation
If you think that a vehicle wrap project is finished once the wrap is installed, then you are wrong. There’s a process called post-installation, which involves using a heath-gun to go over the wrapped areas on curved edges to make sure that these reach a certain temperature as required. For solid color wraps, they need to reach 45° to 50° Celsius while for printer media, it must be 85° to 90° Celsius.
The reason behind this is that vinyl has PVC as a component. PVC allows the vinyl to go back to its original shape even when stretched. However, once you have stretched the vinyl, making it go back to its original shape means that it will shrink as it pulls back. To prevent this, the stretched areas must reach a specific temperature to be able to hold its shape.
Conclusion
We’re almost done… but not quite. When anything else happens after the installation, what do you do? You call customer service. Sometimes, it’s the only thing you can depend on. At Arete Digital Imaging, we make sure that we check on our clients after the installation. If it doesn’t go well, we re-do our work until it does.